
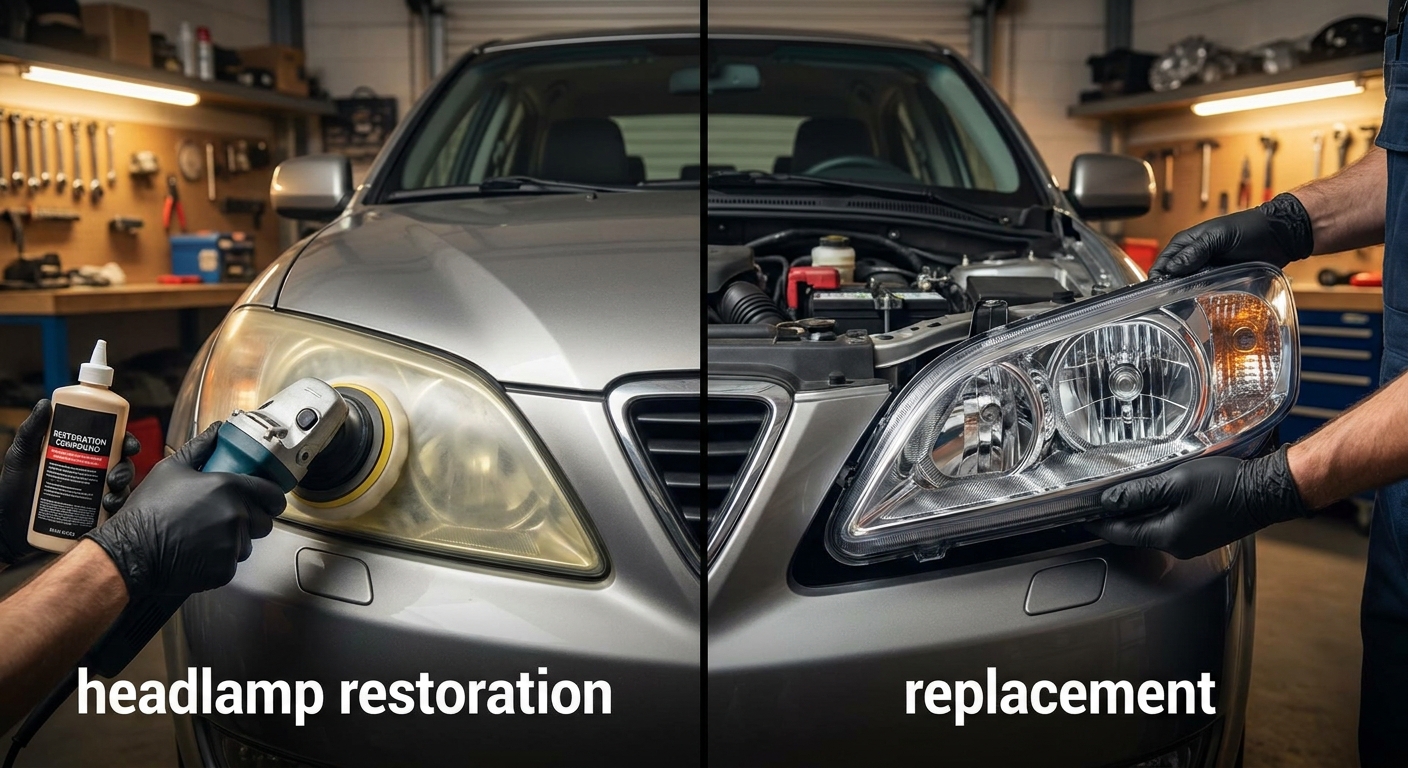
Headlamp Restoration vs Replacement 2026 Guide
Your headlights are yellowed, foggy, or cracked — and you need to decide whether to restore or replace them before your next roadworthy. This guide walks through every step of that decision, the restoration process itself, and the exact points where replacement becomes the only sensible call.
TL;DR: Headlamp restoration vs replacement comes down to lens condition and cost. Polycarbonate lenses that are oxidised or lightly scratched restore well with wet-sanding and UV coating — typically under R500 DIY or R800–R1,500 at a workshop. Lenses that are cracked, crazed through the base layer, or internally clouded cannot be restored; those need replacement. In 2026, a quality aftermarket headlamp unit for most South African market vehicles runs R1,200–R4,500 per side. Know which category your lenses fall into before spending a cent.
Why this matters
Failed or degraded headlamps are a roadworthy fail in South Africa. Beyond legality, a heavily oxidised lens cuts light output by up to 80% — the beam that should reach 60 m in front of you barely clears 30 m. That gap is the difference between stopping in time and not. The good news: most lenses on vehicles made after 1990 are polycarbonate, which responds well to abrasive restoration. The bad news: not every lens is salvageable, and a botched restore can cost you the price of a new unit anyway.
What you'll need
Before starting, confirm you have the right materials. Using the wrong grit or skipping the UV coat turns a one-hour job into a two-day problem.
For restoration:
- Wet-and-dry sandpaper: 400, 800, 1500, 2000, 3000 grit
- Automotive masking tape (protect surrounding paint)
- Clean microfibre cloths — at least 4
- Spray bottle with water
- Cutting compound or headlamp polish
- UV-resistant clear coat or dedicated headlamp sealant
- Random orbital polisher (optional but cuts time by 60%)
- Isopropyl alcohol (IPA) for surface prep
For replacement:
- OEM or quality aftermarket headlamp unit (confirm fitment by VIN)
- Torx or Phillips screwdrivers (varies by make)
- Trim removal tools
- Headlamp adjustment screwdriver
- Loom connector contact cleaner
Time budget: Restoration — 2 to 4 hours per lamp. Replacement — 30 to 90 minutes per side depending on vehicle.
Step 1: Diagnose the lens before you touch it
What this accomplishes: Prevents wasting time and materials on a lens that cannot be saved.
Run this check in direct sunlight. Examine the lens from three angles: straight-on, from 45°, and from behind with the housing removed if possible.
- Yellow haze on the surface only — oxidation. Restorable.
- Fine surface scratches — restorable if they don't catch a fingernail deeply.
- Crazing (a fine web of cracks in the clear coat but not the base) — restorable with aggressive wet-sanding if the base polycarbonate is intact.
- Deep cracks, chips, or fractures in the lens — replace. No polish fixes a structural break.
- Internal condensation or clouding — the seal has failed. Restoration clears the outside but the inside will fog again within weeks. Replace.
- Yellowing that doesn't shift with a drop of IPA on a cloth — the UV damage has penetrated the base layer. Replace.
Common mistake: Skipping the IPA test. If IPA temporarily clears the haze, you have surface oxidation. If it makes no difference, the damage is sub-surface.
Expected outcome: A clear go/no-go decision before you buy a single sheet of sandpaper.
Step 2: Mask and prep the surrounding area
What this accomplishes: Wet-sanding near bare paint without masking will scratch your bonnet and guards. Fixing that costs far more than the headlamp job.
Apply 3–4 layers of masking tape around the full perimeter of the lens. Extend tape 20 mm onto the surrounding panel. Wipe the lens surface with IPA and let it dry for 2 minutes — this removes wax, silicone, and any previous sealant that would clog your sandpaper immediately.
Common mistake: Single-layer tape. The orbital polisher will cut through one layer fast.
Expected outcome: Clean, protected perimeter, dry lens surface ready for sanding.
Step 3: Wet-sand in sequence
What this accomplishes: Each grit removes the scratches left by the previous, coarser grit. Skipping grits leaves visible sanding marks under the final coat.
Start with 400 grit only if the lens is heavily oxidised or crazed. For mild yellowing, start at 800. Keep the sandpaper and lens wet at all times — dry-sanding generates heat that warps polycarbonate.
- 400 grit: Sand in one direction, light pressure, 3–4 minutes per lamp. The lens will look terrible — milky white. This is correct.
- 800 grit: Cross-direction from your 400 passes. Sand until all 400-grit scratches are gone, roughly 3 minutes.
- 1500 grit: Back to original direction, 2–3 minutes. Haze starts to reduce.
- 2000 grit: Cross-direction, 2 minutes. Surface should look semi-clear when wet.
- 3000 grit (optional): Reduces polishing time significantly. 90 seconds per lamp.
Wipe dry and inspect under light after each grit. Any deep scratch still visible means more time at that grit, not a jump to the next.
Common mistake: Rushing from 800 to 2000. The visible scratches at each stage compound — skip a grit and you'll spend double the time polishing.
Expected outcome: Uniformly hazy lens with no visible deep scratches after the final grit.
Step 4: Polish to clarity
What this accomplishes: Removes the fine sanding marks from 2000–3000 grit and restores optical clarity.
Apply a grape-sized amount of cutting compound to a foam polishing pad. Work in overlapping passes at medium speed on an orbital, or with firm circular pressure by hand. Two passes of 90 seconds each, then wipe clean with a microfibre. Repeat with a finishing polish if needed. The lens should be optically clear — no haze, no swirl marks visible in direct sunlight.
Common mistake: Using a rotary polisher at high speed on polycarbonate. Generates heat spikes that cause micro-crazing. Stick to orbital or hand.
Expected outcome: Clear, glossy lens surface ready for sealing.
Step 5: Apply UV-resistant clear coat
What this accomplishes: This is the step most DIYers skip — and it's why restored headlamps cloud again within 3–6 months. Polycarbonate has no UV resistance of its own. The factory applies a UV-stable clear coat; wet-sanding removes it. You must replace it.
Apply 2–3 thin coats of dedicated headlamp sealant or automotive UV clear coat. Each coat: 30-second application, 5-minute flash time before the next coat. Do not wet-sand between coats. After the final coat, allow 4 hours cure time before driving — 24 hours before washing.
Amounts: Two lamps require approximately 1/3 of a standard 250 ml rattle-can. Buy the full can — you'll need it for the next restoration or a touch-up.
Common mistake: Using standard automotive lacquer without UV stabilisers. Looks identical out of the can, fails within 4 months.
Expected outcome: Hard, UV-stable coating on a clear lens. Should last 2–3 years before requiring a light re-polish and re-seal.
Step 6: Aim the beam after any lens work
What this accomplishes: Restoration and especially replacement shift the beam pattern. An incorrectly aimed headlamp that passes cosmetically will still fail a roadworthy — and will dazzle oncoming traffic.
Park 7.6 m (25 feet) from a flat wall in a dimly lit space. Mark the centre of each lamp on the wall with tape. The top edge of the low-beam hot spot should sit 50–100 mm below the lamp centre mark. Adjust using the headlamp adjuster screw (usually accessible from the engine bay) until both sides align. If you've replaced the unit, confirm beam spread matches the opposite side.
Common mistake: Skipping the aim check after a replacement because "it's a direct fit". OEM and aftermarket units often have slightly different reflector positioning.
Expected outcome: Both headlamps producing an even, correctly aimed beam pattern that won't fail a roadworthy inspection.
Troubleshooting
Lens is clear but clouds again within weeks — the internal seal has failed and moisture is getting in. No amount of external restoration fixes this. Replace the unit.
Sanding marks still visible after polishing — you moved to the next grit too early. Wet-sand again with the grit that preceded the visible scratches, extend your time, then repolish.
UV coat peeling or fisheying — surface had wax or silicone contamination before application. Strip the coat with IPA, clean thoroughly, reapply. Never apply over a contaminated surface.
New aftermarket unit doesn't seat flush — aftermarket fitment tolerances are wider than OEM. Check the mounting tabs; some require minor adjustment of the bracket, not the bumper. Force-fitting cracks the housing.
Beam aimed correctly but roadworthy still fails on lamps — inspect the bulb type. Aftermarket units sometimes accept H4 where the car is registered with H7, or vice versa. Confirm the bulb spec on your registration papers or vehicle data sheet.
One lamp restores perfectly, the other won't clear — different exposure histories on each side (common on vehicles parked in one direction regularly). The worse lamp may have sub-surface damage. Treat it as a replacement candidate and restore only the better side.
Tools and resources
- Wet-and-dry sandpaper set (400–3000 grit): R80–R150 at Midas, Makro, or any automotive trade counter
- Dedicated headlamp restoration kit (includes polish and sealant): R180–R350
- UV-resistant headlamp clear coat (rattle-can): R120–R200
- Random orbital polisher: R450–R900 entry-level; worth it if you have more than two vehicles to do
- OEM headlamp units: sourced via dealer parts counters or reputable online fitment platforms; confirm part number against VIN before ordering
- Aftermarket units: Goldwagen, Midas, and specialist vehicle dismantlers carry common fitments — always inspect seal condition before purchase
For body and panel work that accompanies a lamp replacement — cracked surrounds, damaged bumper sections, or accident-related damage — Metalcross Vehicle Makeover Clinic handles these repairs in Johannesburg. If the damage extends to the bumper or surrounding panels on an SUV, see the bumper repair for SUVs in Johannesburg page for scope and process detail.
What to do next
If restoration is the verdict for your lenses, buy the full sanding kit, not the cheap 3-step kit — the shortcut kits skip the coarse grits and leave sub-surface oxidation that returns in weeks. If replacement is the verdict, source the unit before booking the fitment appointment; lead times on less-common fitments can run 5–10 business days in 2026. And if the headlamp damage came with collision damage to surrounding panels, get a quote that covers both — doing them separately almost always costs more.
For a panel beater quote that covers lamp surrounds and bodywork in the same job, the guide on how to get panel beater quotes online in South Africa walks through what information to have ready before you call.
FAQ
What is the difference between headlamp restoration and replacement?
Restoration uses abrasive polishing to remove surface oxidation and yellowing from the existing polycarbonate lens, then seals it with UV coating. Replacement installs a new headlamp unit. Restoration costs less but is only viable when the lens itself is structurally sound.
How long does a professional headlamp restoration last?
A properly done restoration — full wet-sand sequence plus UV-stable sealant — lasts 2 to 3 years under normal South African sun exposure. Restorations done without UV sealant typically cloud again within 3 to 6 months.
Can I restore headlamps myself in 2026 or do I need a workshop?
DIY restoration is fully achievable with a R150–R350 kit and 2–4 hours per lamp. The step most people get wrong is applying UV sealant at the end. Skip that step and the result is temporary. A workshop will typically charge R800–R1,500 for both lamps in 2026.
How much does headlamp replacement cost in South Africa?
Aftmarket units for common vehicles run R1,200–R4,500 per side in 2026, depending on make and model. OEM units from a dealer parts counter are typically 2 to 3 times that price. Fitment adds R300–R800 per side at a workshop.
Will cloudy headlamps fail a roadworthy inspection?
Yes. South African roadworthy regulations require headlamps to produce adequate light output. Heavily oxidised lenses that measurably reduce beam intensity are a fail — the tester does not need to measure lux output; visible degradation is enough to reject the vehicle.
Is headlamp restoration worth it or should I just replace?
Restore when the damage is surface oxidation or shallow crazing and the lens base is intact. Replace when there are cracks, internal condensation, or UV damage that has penetrated the base layer. Spending R300 on restoration materials on a lens that needs replacement wastes both the money and the time.
Can cracked headlamp lenses be repaired?
No. Structural cracks in the polycarbonate lens cannot be polished or filled to a standard that restores optical clarity or weatherproofing. Replace the unit.
How do I know if my headlamps are polycarbonate or glass?
Vehicles manufactured after approximately 1990 use polycarbonate lenses. Glass headlamps are on older or classic vehicles. Polycarbonate scratches with a fingernail; glass does not. Polycarbonate responds to wet-sanding; glass does not oxidise in the same way but can still be hazed by stone chips.
One last thing
The UV sealant step is the difference between a restoration that lasts 3 years and one that lasts 3 months — but there is a second factor almost nobody mentions: applying the sealant in direct sunlight. Heat from the sun accelerates flash time unpredictably, causes fisheye, and reduces adhesion. Do this job in shade, with the panels below 35°C. On a Highveld summer afternoon, 35°C on a dark-coloured panel arrives faster than you'd expect. Early morning is the right window.